

How to Build a React Website
In this comprehensive guide, we’ll delve into React, a powerful JavaScript library developed by Facebook, designed specifically for building interactive user interfaces. Whether you’re new to React or looking to enhance your skills, this article will cover everything from setting up your development environment to deploying your React applications. By the end, you’ll have a solid understanding of React’s core concepts and practical insights into creating scalable and maintainable applications.
React has become a go-to choice for building modern, interactive websites. Its popularity stems from its ability to create dynamic user interfaces efficiently. Let’s dive into how you can get started with building your own React website.
What is React and Why Should You Use It?
React is a JavaScript library created by Facebook for building user interfaces. It’s become incredibly popular because of its component-based architecture. Instead of building entire web pages, React lets you create small, reusable components that update automatically when your data changes.
This makes your code more modular, easier to maintain, and scalable as your project grows.
So, why choose React? If you’re aiming for a fast, responsive website with a smooth user experience, React is your go-to. Plus, it’s supported by a huge community of developers, so you’ll find plenty of resources and support as you build your project.
How Do You Set Up Your Development Environment?
Before you start coding, you’ll need to set up your development environment. Here’s how to do it:
- Install Node.js: React applications are built using Node.js, which includes npm (Node Package Manager) for managing dependencies. Head over to nodejs.org and download the latest stable version of Node.js for your operating system. Once downloaded, run the installer and follow the installation instructions.
- Create a New React App: Once Node.js is installed, open your terminal or command prompt. To create a new React application, use the following command:
npx create-react-app my-react-app
Replace my-react-app with your preferred project name. This command sets up a new React project with all the necessary files and dependencies.
- Navigate to Your Project: After the project is created, navigate into your project directory using the terminal:
cd my-react-app
- Start the Development Server: Now, let’s fire up the development server. In your terminal, run:
npm start
This command starts a local development server and automatically opens your React application in the default web browser. You’ll see a basic React template running at http://localhost:3000.
What Tools and Libraries Do You Need for a React Project?
To build a robust React application, you’ll want to leverage some essential tools and libraries:
- React Router: If your app involves multiple pages or views, React Router helps with navigation and routing.
- Redux: For managing the global state of your application. Redux is especially useful for larger applications where state management becomes more complex.
- Styled-components or CSS Modules: For styling your React components. Styled-components allows you to write actual CSS to style your components directly within your JavaScript files, keeping your styles scoped and maintainable.
These tools and libraries enhance the functionality and organization of your React projects, making development smoother and more efficient.
How Do You Create a New React Application?
Creating a new React application is the first step towards building your website. Here’s how you can do it:
- Create a New React App: To create a new React application, use create-react-app, which is a tool provided by Facebook for generating a new React project setup with all the necessary configurations and dependencies. In your terminal, type:
npx create-react-app my-react-app
Replace my-react-app with the name you want to give your project. This command sets up everything you need to get started with React, including a development server.
- Navigate to Your Project: Once the project is created, navigate into your project directory using the terminal:
cd my-react-app
- Start the Development Server: Now, let’s start the development server to see your new React application in action. In the terminal, type:
npm start
This command will start a local development server and automatically open your React application in your default web browser. You’ll see a basic React template running at http://localhost:3000.
And there you go! You’ve successfully created and started your new React application. Now, let’s move on to understanding components.
What Are Components and How Do You Build Them?
Components in React are like Lego bricks that you can piece together to build your user interface. They’re the fundamental units that encapsulate different parts of your UI, making it easier to manage and reuse code across your application. Let’s explore how components work and how you can build them effectively.
Functional Components: Simple and Straightforward
Functional components are like JavaScript functions. They take in props (which are basically inputs) and return JSX (JavaScript XML) to tell React what should be displayed on the screen. Here’s an example:
					import React from 'react';

function Greeting(props) {
    return <h1>Hello, {props.name}!</h1>;
}

export default Greeting;
In this Greeting component, it receives a name prop and displays a greeting message. It’s clean, concise, and perfect for simple UI elements.
Class Components: Adding More Power with State
Class components are ES6 classes that extend React.Component. They can hold their own state and have additional features like lifecycle methods. Here’s how a class component might look:
					import React, { Component } from 'react';

class Counter extends Component {
    constructor(props) {
        super(props);
        this.state = { count: 0 };
    }

    render() {
        return (
            <div>
                <p>Count: {this.state.count}</p>
                <button onClick={() => this.setState({ count: this.state.count + 1 })}>
                    Increment
                </button>
            </div>
        );
    }
}

export default Counter;
In this Counter component, we have a local state (count) that updates each time the button is clicked. Class components are handy for managing more complex UI logic and maintaining internal state.
Using Components in Your App
Once you’ve defined your components, you can use them throughout your application by importing them where needed. This modular approach helps keep your code organized and promotes reusability—just like assembling Lego bricks to create different structures!
Why Components Are Essential
Components are the backbone of React development. They allow you to break down your UI into manageable pieces, making your codebase easier to maintain and scale. Whether you’re building a small app or a large-scale project, components streamline development and improve code efficiency.
How Do You Manage State in React?
Managing state in React is like managing a dynamic flow of data within your application—it’s essential for handling user interactions, data fetching, and more. Let’s delve deeper into how state management works in React, both in class components and with functional components using Hooks.
Understanding State in React
In React, state is a special JavaScript object that stores component-specific data. It determines how a component behaves and renders based on changes to this data. Typically, you initialize state in a class component’s constructor using this.state.
Updating State Safely
One golden rule in React: never mutate state directly. Instead, use the setState method provided by React. Here’s how you can update state in a class component:
this.setState({ count: this.state.count + 1 });
In this example, setState increments the count state by 1. React then schedules an update to re-render the component with the new state.
Passing State as Props
State can be passed down to child components as props. This allows child components to access and display data from their parent component’s state. It’s a powerful way to share data across your application while maintaining a clear data flow.
Functional Components and Hooks
With the introduction of React Hooks, functional components can now manage state and use lifecycle features previously exclusive to class components. Let’s see an example using the useState Hook:
					import React, { useState } from 'react';

function Counter() {
    const [count, setCount] = useState(0);

    return (
        <div>
            <p>Count: {count}</p>
            <button onClick={() => setCount(count + 1)}>
                Increment
            </button>
        </div>
    );
}

export default Counter;
In this Counter functional component, useState initializes the count state to 0, and setCount updates count when the button is clicked. Hooks provide a simpler and more concise way to manage state in functional components.
What Are Props and How Do They Work?
Props in React are like messengers between components—they carry data from one component (usually a parent) to another (a child). They’re a fundamental part of how React applications share information and customize component behavior based on different data inputs.
Passing Props: Sharing Data Between Components
Imagine you have a ParentComponent and a ChildComponent. Here’s how you pass a name prop from ParentComponent to ChildComponent:
					// ParentComponent.js
import React from 'react';
import ChildComponent from './ChildComponent';

function ParentComponent() {
    const name = 'Alice';

    return (
        <div>
            <ChildComponent name={name} />
        </div>
    );
}

export default ParentComponent;
In this example, ParentComponent sends the name prop to ChildComponent by including name={name} in the JSX tag. This allows ChildComponent to receive and use name as needed.
Accessing Props: Using Data in Components
Once ChildComponent receives the name prop, it can access and use it to customize its output:
					// ChildComponent.js
import React from 'react';

function ChildComponent(props) {
return <p>Hello, {props.name}!</p>;
}

export default ChildComponent;
Here, ChildComponent simply displays a greeting using the name prop passed from ParentComponent. In functional components like this, props are accessed directly as arguments.
Pro Tip: Destructuring Props
To keep your code clean and readable, you can destructure props directly in functional components:
					// ChildComponent.js
import React from 'react';
return <p>Hello, {name}!</p>;
}

export default ChildComponent;
Destructuring allows you to pull out specific props from the props object, making your component function more concise and focused.
How Do You Implement Routing in a React Application?
In React, routing isn’t just about moving from one page to another but maintaining a cohesive user experience without page reloads. React Router simplifies this process by managing URLs and rendering components based on those URLs.
Step 1: Installing React Router
To start using React Router, you first need to install it in your project. You can do this easily using npm:
npm install react-router-dom
React Router DOM includes all the necessary components and utilities to handle routing within your React application.
Step 2: Setting Up Routes
Once installed, you define your routes typically in your main App.js or a dedicated routing component. Here’s a basic setup using BrowserRouter, Route, and Switch components:
					// App.js
import React from 'react';
import { BrowserRouter as Router, Route, Switch } from 'react-router-dom';
import Home from './components/Home';
import About from './components/About';
import NotFound from './components/NotFound';

function App() {
    return (
        <Router>
            <Switch>
                <Route exact path="/" component={Home} />
                <Route path="/about" component={About} />
                <Route component={NotFound} />
            </Switch>
        </Router>
    );
}

export default App;
Here’s what’s happening:
- BrowserRouter provides the context for handling routing.
- Route components define specific paths (/, /about, and catch-all for NotFound) and specify which components (Home, About, and NotFound) to render for each route.
- Switch ensures that only the first matching route is rendered, preventing multiple components from being rendered simultaneously.
Step 3: Navigating Between Routes
To create links that navigate between routes without refreshing the page, you use Link components from React Router:
					// Home.js
import React from 'react';
import { Link } from 'react-router-dom';

function Home() {
    return (
       <div>
           <h1>Home Page</h1>
           <Link to="/about">About</Link>
       </div>
   );
}

export default Home;
In this example, clicking on the About link will smoothly take the user to the /about route, all within the same SPA context.
Why Routing Matters
Routing isn’t just about moving between pages; it enhances user experience and application usability. Consider these stats:
- 85% of users expect a mobile website to load as fast or faster than on their desktop.
- 70% of website visitors abandon pages that take more than 3 seconds to load.
React Router helps in maintaining SPA behavior, reducing page load times by dynamically rendering components, and providing a seamless navigation experience.
What Are the Best Practices for Styling in React?
Styling in React can be approached in several ways, each with its own best practices depending on the project size and complexity:
- CSS Modules: CSS Modules allow you to write traditional CSS files where class names are scoped locally to the component. This prevents style conflicts and improves maintainability.
					// styles.module.css
.button {
    background-color: #007bff;
    color: white;
    padding: 10px 20px;
    border: none;
    border-radius: 5px;
}

// Button.js
import React from 'react';
import styles from './styles.module.css';

function Button() {
    return <button className={styles.button}>Click me</button>;
}

export default Button;
- Styled-components: Styled-components allow you to write actual CSS in your JavaScript files using tagged template literals. This approach keeps styles closely tied to the components they style.
					// Button.js
import React from 'react';
import styled from 'styled-components';

const StyledButton = styled.button`
    background-color: #007bff;
    color: white;
    padding: 10px 20px;
    border: none;
    border-radius: 5px;
`;

function Button() {
    return <StyledButton>Click me</StyledButton>;
}

export default Button;
- CSS-in-JS Libraries: Libraries like styled-components or emotion offer flexibility in how you write and manage styles. Choose one that fits your project’s needs and maintain consistency in style usage across your application.
- Global Styles: Use global styles for common elements like body styling, fonts, and resets. This ensures consistency across your application.
By choosing the right styling approach and following best practices, you can maintain a scalable and maintainable codebase while creating visually appealing React applications.
How Do You Integrate APIs and Fetch Data in React?
Integrating APIs and fetching data in React opens up a world of possibilities for building dynamic and interactive applications. Whether you’re pulling in real-time weather updates, displaying user profiles from a database, or fetching the latest news articles, here’s how you can seamlessly integrate APIs into your React projects.
Step-by-Step Guide to API Integration in React
Choosing an API
- The first step is selecting an API that provides the data you need. This could be a RESTful API, GraphQL API, or any other service that exposes data over HTTP. For example, you might use an API to fetch product listings for an e-commerce site or retrieve user information for a social media app.
Fetching Data with fetch or axios
- Once you’ve chosen your API, you’ll need a way to fetch data from it. React provides two popular options: using the native fetch API or the third-party library axios.
Using fetch: The fetch API is straightforward and built into modern browsers. Here’s how you might use it in a React component:
					import React, { useEffect, useState } from 'react';

function DataFetching() {
    const [data, setData] = useState(null);

    useEffect(() => {
        fetch('https://api.example.com/data')
            .then(response => response.json())
            .then(data => setData(data))
            .catch(error => console.error('Error fetching data:', error));
    }, []);

    return (
        <div>
            {data ? (
                <ul>
                    {data.map(item => (
                        <li key={item.id}>{item.name}</li>
                    ))}
                </ul>
            ) : (
                <p>Loading...</p>
            )}
        </div>
    );
}

export default DataFetching;
Using axios: Alternatively, you can use axios, a powerful HTTP client that simplifies making requests and handling responses:
npm install axios
Then, integrate it into your React component like this:
					import React, { useEffect, useState } from 'react';
import axios from 'axios';

function DataFetching() {
    const [data, setData] = useState(null);

    useEffect(() => {
        axios.get('https://api.example.com/data')
            .then(response => setData(response.data))
            .catch(error => console.error('Error fetching data:', error));
    }, []);

    return (
        <div>
            {data ? (
                <ul>
                    {data.map(item => (
                        <li key={item.id}>{item.name}</li>
                    ))}
                </ul>
            ) : (
                <p>Loading...</p>
            )}
        </div>
    );
}

export default DataFetching;
Handling Data
Once you’ve fetched data successfully, you can display it in your React components. Manage data using React’s state management tools like useState and lifecycle hooks like useEffect to ensure your UI updates reflect the latest data from the API.
What Are Some Common Performance Optimization Techniques in React?
Optimizing performance is crucial for ensuring your React application runs smoothly and efficiently. Here are some common techniques to improve performance:
- Use React.memo: memo is a higher-order component that memoizes functional components, preventing unnecessary re-renders when props haven’t changed.
					import React from 'react';

const MyComponent = React.memo(function MyComponent(props) {
    /* component logic */
});

export default MyComponent;
- Avoid Reconciliation with Keys: Ensure each child in a list has a unique key This helps React identify which items have changed, added, or removed.
					<ul>
    {items.map(item => (
        <li key={item.id}>{item.name}</li>
    ))}
</ul>
- Lazy Loading with Suspense: Use React’s Suspense component and lazy function to lazy load components, reducing initial bundle size and improving load time.
					const LazyComponent = React.lazy(() => import('./LazyComponent'));

function MyComponent() {
    return (
        <React.Suspense fallback={<div>Loading...</div>}>
            <LazyComponent />
        </React.Suspense>
    );
}
- Optimize Images and Assets: Compress and optimize images and other assets to reduce load times. Use formats like WebP for better compression and faster loading.
- Memoize Expensive Computations: Use memoization techniques (e.g., useMemo hook) to cache expensive computations and avoid recalculating values unnecessarily.
- Profiler API: Use React’s Profiler API to identify performance bottlenecks and optimize components that are causing excessive re-renders or slow rendering.
- Code Splitting: Split your code into smaller bundles using tools like lazy or import() for dynamic imports. This reduces initial load times by loading only necessary code upfront.
Implementing these techniques can significantly enhance the performance and responsiveness of your React applications, providing a better user experience overall.
How Do You Deploy a React Application?
Deploying a React application is like putting your creation onto a stage where the world can see it. Here’s a step-by-step guide to get your React project live and accessible to users:
Step-by-Step Guide to Deploying a React Application
Build Your Application
Before you deploy, you need to prepare your React application for production. This involves optimizing your code and assets to ensure fast load times and smooth performance. Open your terminal and run:
npm run build
This command compiles your React code into static HTML, CSS, and JavaScript files, neatly organized in a build folder.
Choose a Hosting Provider
Selecting the right hosting provider is crucial for your application’s performance, scalability, and ease of deployment. Here are some popular options:
- Netlify: Known for its simplicity and integration with Git, Netlify offers continuous deployment and hosting services.
- Vercel (formerly Zeit): Focuses on serverless deployment and provides seamless integration with Git repositories for automatic deployments.
- Firebase Hosting: Part of Google’s Firebase platform, it offers fast hosting with a global CDN and easy deployment using Firebase CLI.
- AWS Amplify: Amazon’s service for full-stack app deployment, providing hosting, CI/CD pipelines, and serverless backend integration.
Deploy Your Application
Depending on your chosen provider, deploying your React application can be straightforward:
- Netlify: Drag and drop your build folder into the Netlify dashboard, or connect your Git repository for automatic deployments.
- Vercel: Connect your Git repository or upload your build folder through the Vercel dashboard.
- Firebase Hosting: Use Firebase CLI to initialize your project and deploy your application with a single command.
- AWS Amplify: Set up a new deployment project using the Amplify CLI or AWS Management Console.
Configure Domain and SSL
Once deployed, you’ll likely want to configure a custom domain (like yourwebsite.com) to give your application a professional touch. Also, ensure you enable SSL/TLS certificates to secure data transmission between your users and the server.
Monitor and Maintain
Deploying isn’t the end of your journey—it’s the beginning of maintaining a live application. Regularly monitor your application for performance metrics and security vulnerabilities. Update dependencies and apply optimizations to keep your app running smoothly.
Why Deployment Matters
Deploying your React application makes it accessible to anyone with an internet connection, opening doors for users to interact with your product or service. According to a survey by Stack Overflow, over 40% of developers use cloud platforms for deploying applications, highlighting the importance of reliable hosting services like Netlify and AWS.
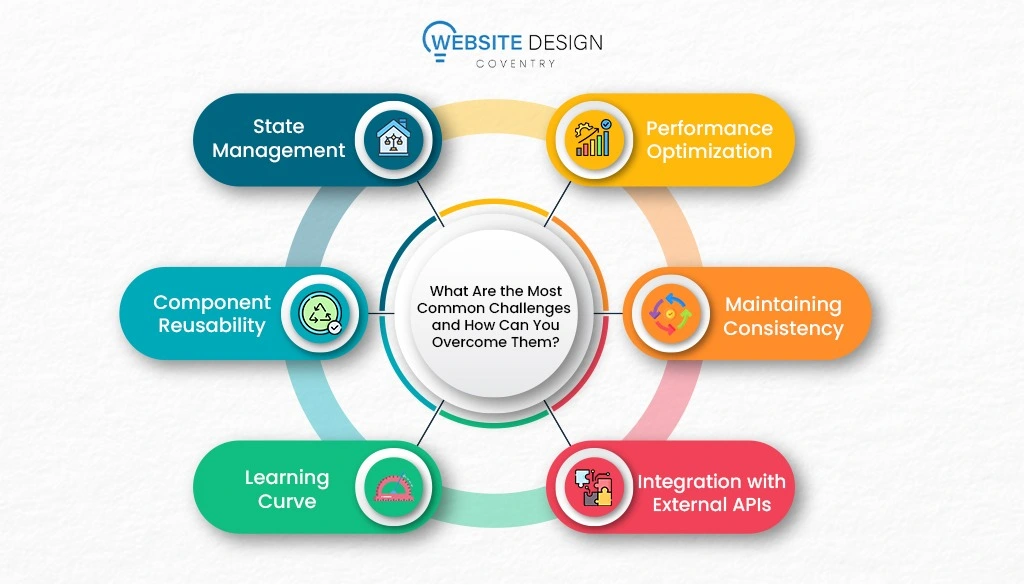
What Are the Most Common Challenges and How Can You Overcome Them?
Building React applications can present several challenges. Here are some common ones and strategies to overcome them:
- State Management: Managing state in large applications can become complex, leading to prop drilling or overly nested components. Use state management libraries like Redux or context API to centralize and simplify state management.
- Performance Optimization: React re-renders components whenever state or props change. Optimize performance by using React.memo, useMemo, useCallback hooks, and implementing code splitting to reduce bundle size.
- Component Reusability: Ensuring components are reusable across different parts of your application can be challenging. Design components with clear responsibilities and consider using higher-order components (HOCs) or hooks for reusable logic.
- Maintaining Consistency: Keeping codebase consistent and readable, especially in teams, can be a challenge. Establish coding conventions, use linters and code formatters, and conduct code reviews to maintain code quality.
- Learning Curve: React’s ecosystem and constant updates can be overwhelming for beginners. Invest time in understanding React fundamentals, practice building projects, and leverage community resources like documentation and tutorials.
- Integration with External APIs: Handling asynchronous data fetching and integrating with external APIs can introduce errors and complexity. Use modern JavaScript techniques like async/await and axios for robust data handling.
By proactively addressing these challenges with best practices and tools, you can build maintainable, scalable React applications that meet performance and usability standards.
How Do You Keep Your React Project Maintainable and Scalable?
To keep your React project maintainable and scalable, start by adopting a modular component design approach. Break down your application into smaller, reusable components like container and presentational components. This not only simplifies development but also enhances maintainability by separating logic from presentation. Choose an appropriate state management strategy—whether it’s Redux for global state or React’s context API for component-specific data—to handle the complexity of your project effectively.
Organize your codebase logically with clear naming conventions and structured folder arrangements that reflect component relationships. This makes navigation easier and helps maintain consistency across your project. Implement rigorous testing practices, including unit, integration, and end-to-end testing using tools like Jest and React Testing Library. This ensures that your application functions as expected and helps prevent regressions. Document your code thoroughly, including components and complex logic, and use comments judiciously to explain decisions, edge cases, and non-obvious aspects of your code.
Monitor your application’s performance regularly using browser developer tools and profiling techniques to identify and address performance bottlenecks. Integrate version control with Git to track changes and collaborate effectively with your team. Establish continuous integration and deployment (CI/CD) pipelines to automate testing and deployment processes, streamlining your development workflow. By following these best practices, you can build and maintain React projects that are scalable, efficient, and adaptable to evolving requirements.
What Are Some Advanced Concepts to Explore After Building Your First React App?
Once you’ve built your first React app and mastered the basics, consider exploring these advanced concepts:
- Server-Side Rendering (SSR) and Static Site Generation (SSG): Learn about frameworks like Next.js or Gatsby.js for SSR and SSG, which improve performance and SEO by pre-rendering pages.
- Advanced State Management: Dive deeper into Redux for complex state management scenarios, including middleware, selectors, and Redux Toolkit for simplified setup.
- Optimizing Performance: Explore advanced performance optimization techniques such as code splitting, lazy loading, virtualization (e.g., React Virtualized), and caching strategies (e.g., memoization).
- Advanced Hooks and Custom Hooks: Master custom hooks for reusable logic and explore advanced hook patterns such as useReducer, useContext, and useLayoutEffect for fine-grained control.
- TypeScript Integration: Integrate TypeScript with React for static typing, improving code readability, refactoring, and catching errors early in development.
- GraphQL and Apollo Client: Learn GraphQL for efficient data fetching and managing data with Apollo Client, integrating with React for seamless data management.
- Advanced Styling Techniques: Explore CSS-in-JS libraries (e.g., styled-components, emotion) for dynamic styling, theming, and handling complex styling requirements in React components.
- Error Handling and Debugging: Implement error boundaries, global error handling strategies, and use browser developer tools for effective debugging and troubleshooting.
- Security Best Practices: Learn about React security best practices, including XSS protection, data sanitization, secure authentication, and authorization techniques.
Continuously challenging yourself with these advanced concepts will deepen your understanding of React and prepare you for building complex, production-ready applications.
Why Should You Hire a Dedicated React Developer?
Hiring a dedicated React developer can be a game-changer for your project. React developers bring a wealth of specialized knowledge and experience that can significantly enhance your web application’s performance and user experience.
Firstly, a dedicated React developer is deeply familiar with the intricacies of the React framework. They understand how to leverage its features to build dynamic and responsive user interfaces. This means your application will not only look great but also function seamlessly across different devices and platforms.
Choosing a dedicated React web development agency like Website Design Coventry brings all these benefits and more. Such agencies offer a team of seasoned professionals who collaborate to bring your vision to life. They provide comprehensive services, from initial concept development to post-launch support, ensuring a smooth and successful project journey.
Conclusion
In this guide, we’ve explored the fundamentals of building a React website, from setting up your development environment to managing state, integrating APIs, and optimizing performance. React’s component-based architecture, coupled with its vast ecosystem of tools and libraries, empowers developers to create modern, interactive web applications efficiently.
By understanding the core concepts of React—such as components, state management, routing, and styling—you’re equipped to tackle both simple UIs and complex applications. Leveraging tools like React Router for navigation, Redux for state management, and styled-components for styling ensures scalability and maintainability in your projects.
As you embark on your React journey, remember to leverage the robust community support and resources available online. Whether you’re building a personal portfolio, an e-commerce platform, or a dynamic web app, React offers the flexibility and power to bring your ideas to life with speed and reliability.
Start building with React today, and unlock endless possibilities for creating cutting-edge web experiences.
Author Bio
Abdul Rafay is an experienced developer and technical writer specializing in web development, particularly in React and JavaScript ecosystems. With a passion for creating intuitive user interfaces and scalable applications, Abdul Rafay has authored comprehensive guides on React, covering everything from setup and component architecture to state management and performance optimization. His expertise extends to integrating APIs, implementing routing, and employing modern styling techniques in React applications. James is dedicated to sharing practical insights and best practices to help developers build robust, responsive websites efficiently.

